
.net

| Terms of service | ||||
|
Brokking |
.net |
Let's keep it simple |
|
|
|
Stepcraft 420 CNC build
Note: click on the Q & A tab for detailed explanations about the build. Recently I got myself a Stepcraft 420 portal CNC milling machine. My goal with this machine is to make carbon fiber parts for my octocopter project. The wooden frame that I use now is made on my Proxxon MF70 micro mill. And as you can see it was a bit of a hassle to get it right. 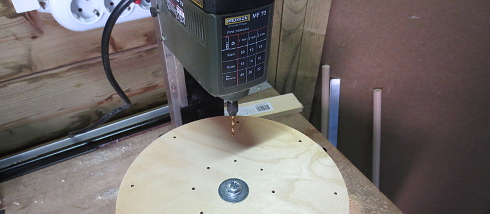
Making larger parts with the Stepcraft will make live much easier. And of course, with this machine I can help others to create something beautiful. The principle of this machine is very straightforward: draw the part that you need on the computer and send it to the machine. Choose the material that you want to use and of you go...
Ok, enough theory. First we need to build it because I ordered the LPT kit version. And there are a lot of parts as you can see. There are more photos in the 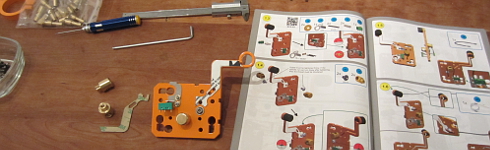
The instructions in the manual are very clear and easy to follow. Stepcraft did a great mechanical job as all the parts fit really snugly. So the build just takes time and patience. Electrically there are a few issues that I don't like. For example, the cables are routed over sharp edges as you can see in this image. The wire for the end switch is already cut at this point. The insulation of the stepper motors is even thinner so I used a piece of shrink tube to protect them. 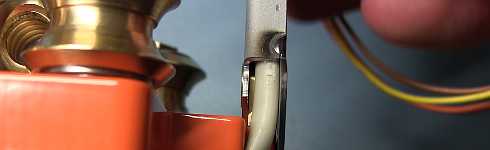
When you finish the build it is almost impossible to replace any wires in the gantry. The plates that cover the wirings are fixed with double sided tape. They will probably break when you try to remove them. And last but not least, the wires run over the spindle shaft of the X axis. 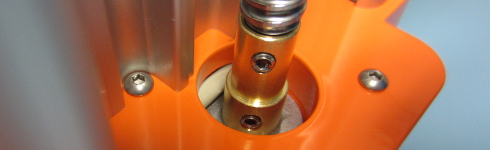
Not a very clean way to do this in my opinion. But we will see if it works. Ok, let's stop complaining. The electronics are in place and I can start connecting the wires to the main board. Just use the schematic in the manual. The wires are long enough and need to be shortened in most cases. 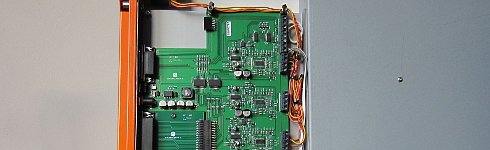
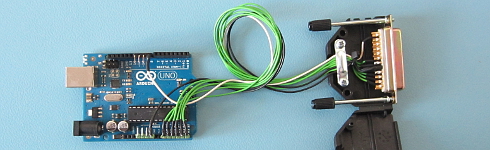
And that's it! The machine is ready for the first test. The software I want to test first is the free and open source LibreCad in combination with the CAM and CNC control software Estlcam. In LibreCad I draw the part for my octocopter and save it as a .dxf file. This file is then opened with Estlcam. With Estlcam it is possible to create the tool pads for the mill. When this is done you can simply click machine project and Estlcam will control the milling machine via a Arduino Uno.
I connected the Arduino Uno to the LPT port of the Stepcraft. The connections that I made can be found in the
In the simplest form it looks like this. I'm planning to get a larger enclosure so I can also add the solid state relay and socket for the spindle. Here you can see the first run on paper with the Estlcam software. As you can see it works very well and I'm more than happy with this first result. Output 4 on the Arduino can be used to switch the spindle on and off. Because the Arduino output is 5Vdc and the spindle runs on 230Vac an interface is necessary. I have chosen the S202T02 solid state relay from Sharp. Via a 330 ohm resistor the output of the Arduino is connected to the input of the solid state relay. The switching output of the solid state relay is connected in series with the spindle. I placed all the components in an enclosure to protect them from the dusty environment. 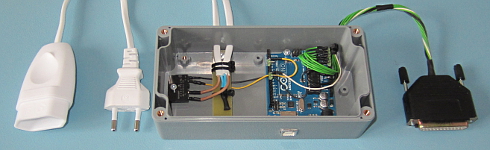
05-01-2016The water bath is made of 18mm vinyl covered chipboard. On top there are four 20 x 20mm L-shaped aluminum profiles. With a small amount of sealant the bath is made watertight. On the bottom there is a piece of Depron foam that I use as a sacrifice bed. The carbon fiber plate is then placed on top of the Depron. The Depron foam and the carbon fiber plate is mounted with double sided tape. 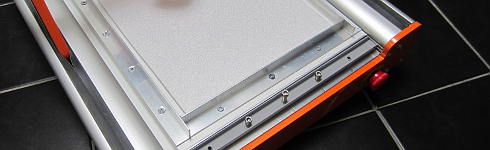
11-01-2016The carbon fiber arrived and it is time for some test runs. First I had to find out that it is not possible to run a 3mm end mill in water. Mayday! Luckily I was prepared and cleaned the mess up with some towels. The 2mm end mill performed much better. No water spillage this time ;-) After some testing I made this piece with the 2mm end mill. And it turned out pretty nice for a first cut. I might try another mill so I can speed up the process. I did this run on 100mm/min and 20,000rpm. 
I'm going to order a solid carbide router with chip breaker that can be used for pcb materials. 13-01-2016Well, it looks like we have a winner. I did a test run with the new mill and it worked great. As you can see there is no delamination and the dimensions are spot-on. With this result I now can start with the first real part: the top and bottom frame plates. Before I can start I maybe need to redesign the frame plates. I did a test with the 'Favourite Littlebee 20A' and worked very well with the Cobra motors. The weight is much lower and will be noticeable in total flight time. Because they are smaller I need to redesign the fixing point. 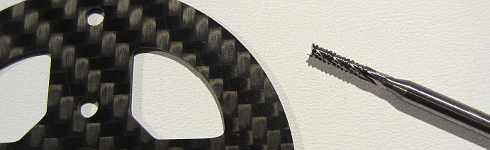
25-01-2016The new water bath is ready. Made out of 12mm HPL and 40x20x2mm aluminum profiles. The double sided tape that I use for fixing the work piece sticks very well to the HPL material. All the screw holes are blind holes. So there is no risk of a water leakage. 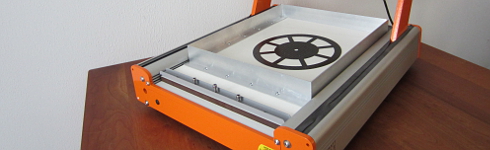
I ordered some new speed controllers. These things are tiny and the weight is ridicules low. In combination with the carbon fiber frame I have some nice weight reduction. Which of course means more flight time. 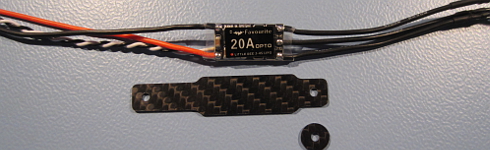
If the complete frame is finished I will post the difference in weight. I also checked the weight reduction that I could achieve with carbon fiber booms. But it turned out that the current aluminum booms are lighter than the carbon fiber ones. So for now I will not change that. 29-01-2016Unfortunately there was a little setback today. The Proxxon IBS/E 100W spindle motor died because it was not powerful enough for the job. Well, that is what I'm thinking. The motor axis was hot enough to melt the plastic insert that couples the motor axis to the cooling fan. 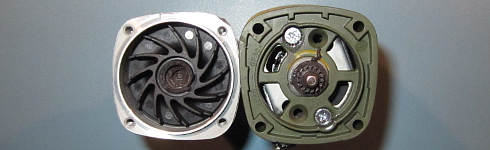
Not a very clever engineered construction if I may say so. During milling the motor performed normal and did not decreased in rpm. Anyhow, I have to get my hands on another spindle motor before I can continue. My pick at this moment is the Kress FME 800-Q. 10-02-2016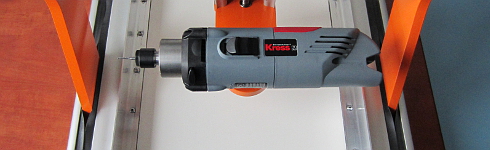
The Kress FME 800-Q just arrived and after a quick inspection I gave it its first job. And it is working way better than the Proxxon IBS/E 100W spindle motor. After some hours of milling the Kress is still working like a charm and I'm very pleased to say that this project has come to an end. I will now use this machine to produce parts form my octocopter:
|
 media
media